Welcome to your guide on driveway channels in New Zealand, where we explore everything you need to know about keeping your driveway safe from the heavy rains that are all too common here. Driveway channels, also known as trench drains, are essential in preventing water from pooling, causing damage, and leading to costly repairs. In this blog, we’ll break down what driveway channels are, why they’re important for NZ properties, the various types available, and how you can install and maintain them to protect your home and enhance its curb appeal. Let’s get started!
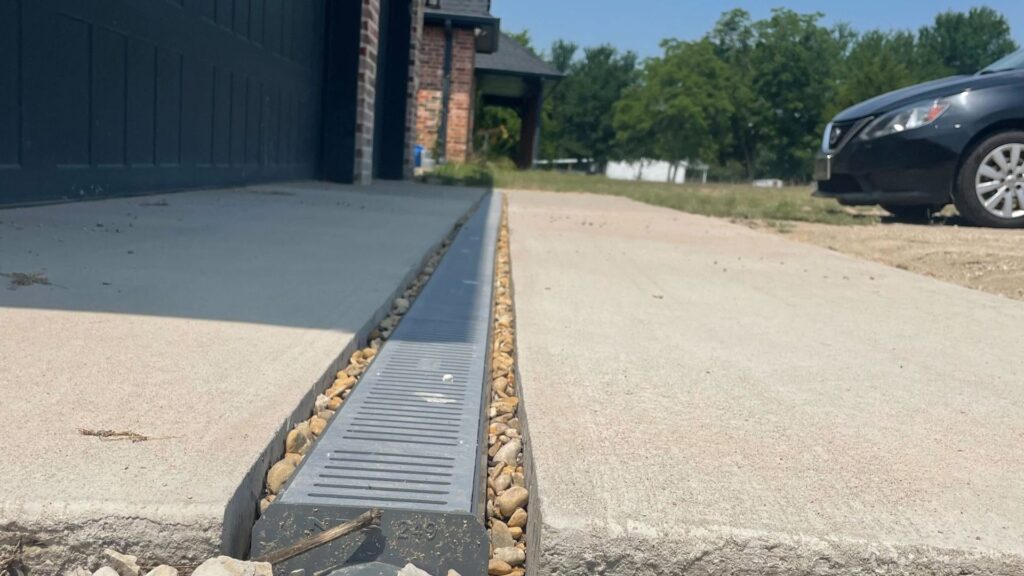
Driveway channels in New Zealand, also known as trench drains, are drainage systems designed to direct water away from driveways, preventing flooding, erosion, and structural damage. They are essential for protecting your property from the country’s frequent heavy rainfall and come in various materials, such as concrete, plastic, and metal. Installing driveway channels helps maintain the longevity and appearance of your driveway while enhancing the overall value of your home.
Table of Contents
What Are Driveway Channels?
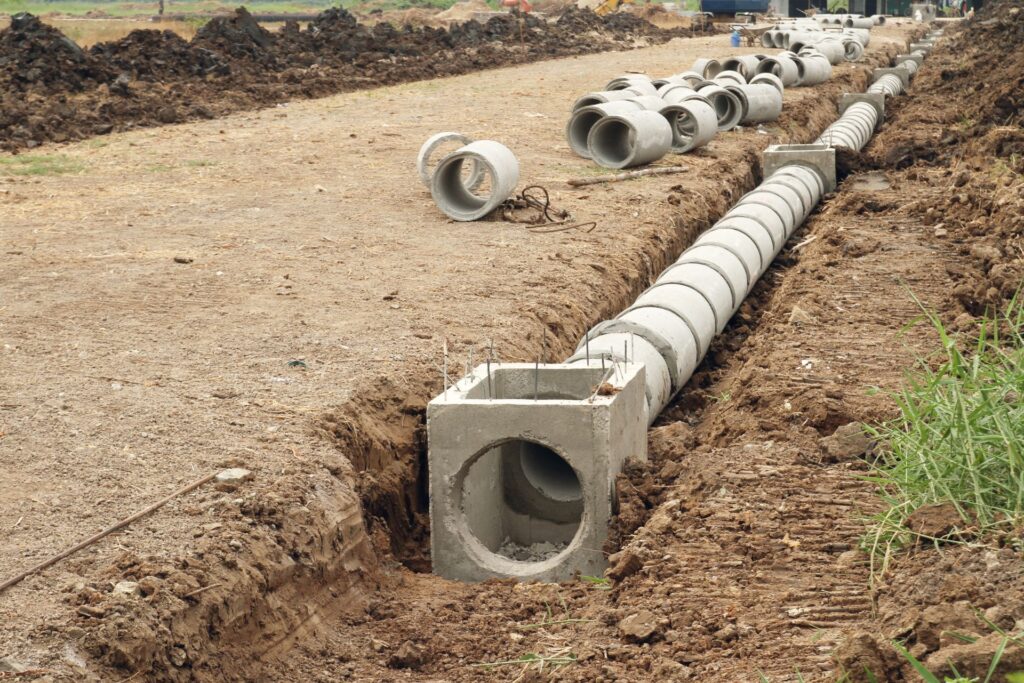
Driveway channels, also known as trench drains, are an essential feature in modern landscaping and driveway construction. They are specifically designed to manage water runoff, directing excess water away from the driveway surface and into the appropriate drainage system. This helps prevent issues like flooding, pooling, and water damage, which can degrade the driveway over time and lead to costly repairs.
Definition of Driveway Channels
Driveway channels, or trench drains, are narrow drainage systems typically installed at the bottom of sloped driveways or in areas prone to water accumulation. Their primary purpose is to collect and redirect surface water away from vulnerable areas, such as the driveway, garage entrance, or nearby landscaping. Without proper drainage, water can pool on the driveway, leading to erosion, cracks, and even flooding in severe cases. Driveway channels ensure that water is efficiently managed and directed into a designated drainage system, reducing the risk of damage to your property.
Materials Used in New Zealand
Driveway channels can be constructed from various materials, each offering unique benefits depending on the situation and climate. In New Zealand, some of the most common materials used for driveway channels include:
- Concrete: A popular choice due to its durability and ability to handle heavy loads. Concrete driveway channels are ideal for areas with high vehicle traffic.
- Plastic: Lightweight and easy to install, plastic channels are often used in residential settings where the load demand is lower. They are also resistant to corrosion, making them suitable for areas with frequent rainfall.
- Metal (Stainless Steel or Galvanised Steel): Metal channels are typically used for more heavy-duty applications, such as industrial or commercial properties. They are highly durable and can withstand significant weight and environmental stress.
Each material has its advantages, and the choice often depends on factors like the amount of rainfall, the load-bearing requirements, and the desired aesthetic.
Types of Driveway Channels
Driveway channels come in various designs, catering to different needs and preferences. Here are some of the most common types found in New Zealand:
- Slot Drains: These are discreet drainage systems where only a narrow slot is visible on the surface. Slot drains are ideal for those who want a minimalist look while still ensuring effective water management. They are commonly used in driveways where aesthetics are a priority.
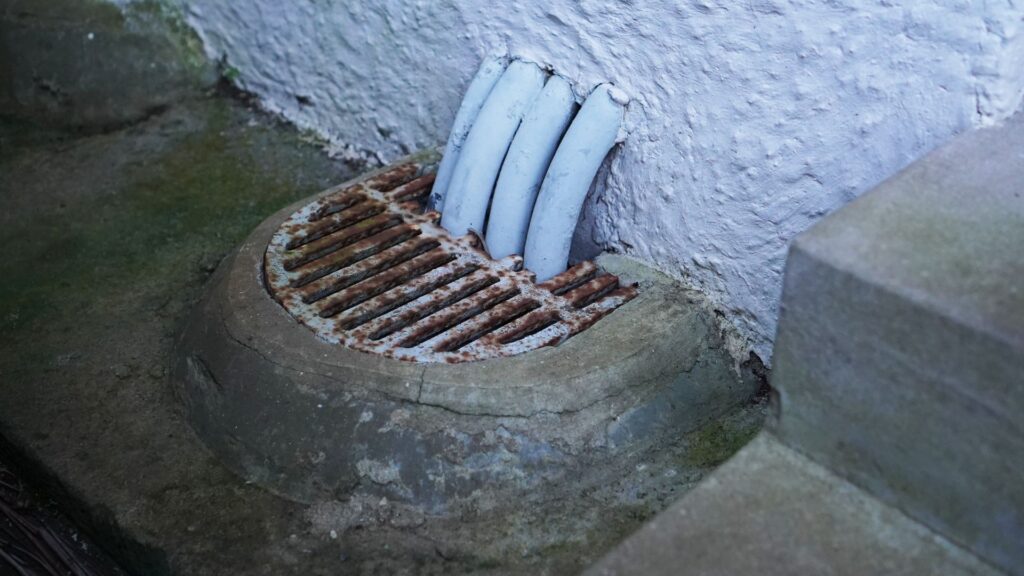
- Grated Trench Drains: These are the most common type of driveway channels, featuring a visible grate that covers the trench below. Grated trench drains are highly effective at capturing water and can handle large volumes of runoff. The grates come in various materials, including plastic, stainless steel, and cast iron, allowing you to choose one that matches the style of your driveway.
- Modular Systems: These are pre-formed, interlocking sections that can be easily installed and configured to fit the specific layout of a driveway. Modular systems are often made from lightweight materials like plastic or polymer concrete and are popular for DIY installations. They are versatile and can be adjusted to fit around corners, curves, and other irregularities in driveway design.
Selecting the right type of driveway channel depends on your specific drainage needs, the slope of your driveway, and the aesthetic you wish to achieve. Properly installed driveway channels not only protect your property from water damage but also enhance the overall functionality and appearance of your driveway.
By considering the definition, materials, and types of driveway channels available, homeowners in New Zealand can make an informed decision to ensure their driveways remain free from water damage for years to come.

Why You Need Driveway Channels In NZ
Driveway channels might seem like a minor addition to your property, but they play a crucial role in protecting your home and its surroundings—especially in a country like New Zealand. Here’s why you should seriously consider installing them:
NZ-Specific Climate Considerations
New Zealand’s unique climate, known for its regular bouts of heavy rainfall, can have a significant impact on your driveway if it’s not equipped with proper drainage. In many regions, particularly during the wet seasons, rain can fall fast and heavily, overwhelming surfaces that don’t have a plan for where that water should go. Without a proper system like driveway channels, you risk water pooling on your driveway, which can lead to both short-term annoyances and long-term damage. The result? An increased likelihood of costly repairs or even replacement down the line. Simply put, driveway channels are your first line of defense against the challenges posed by New Zealand’s weather patterns.
Preventing Water Damage
Water pooling on a driveway is more than just a minor inconvenience—it can create a series of problems that may cost you big in the long run. When water is left to sit on the surface, it seeps into cracks, accelerates wear and tear, and contributes to erosion underneath the driveway itself. Over time, this can cause your driveway to crack, sink, or become unstable. Worse, that excess water may find its way to your home’s foundation, leading to structural issues. Driveway channels help prevent all this by efficiently directing rainwater away from the driveway and into a designated drainage system, avoiding the build-up of water and ensuring that your driveway remains stable and intact for years to come.
Enhancing Property Value
Beyond just protecting your property from damage, installing driveway channels can also be a smart investment in your home’s overall value. A well-maintained driveway that includes proper drainage not only looks more professional and well-cared for but also signals to potential buyers that you have taken steps to protect the property’s infrastructure. This can boost your home’s curb appeal and, in turn, its market value. Especially in New Zealand, where weather conditions can be tough on homes, buyers may be particularly attuned to features like driveway drainage that demonstrate long-term thinking and proactive care. By installing driveway channels, you’re making your property more attractive to future buyers while also enjoying the peace of mind that comes with better water management.
This section covers how driveway channels are a small but significant feature that ensures your driveway stays in good condition, prevents water damage, and boosts property value, all while accommodating New Zealand’s unique climate conditions.
Types Of Driveway Channels Available In NZ
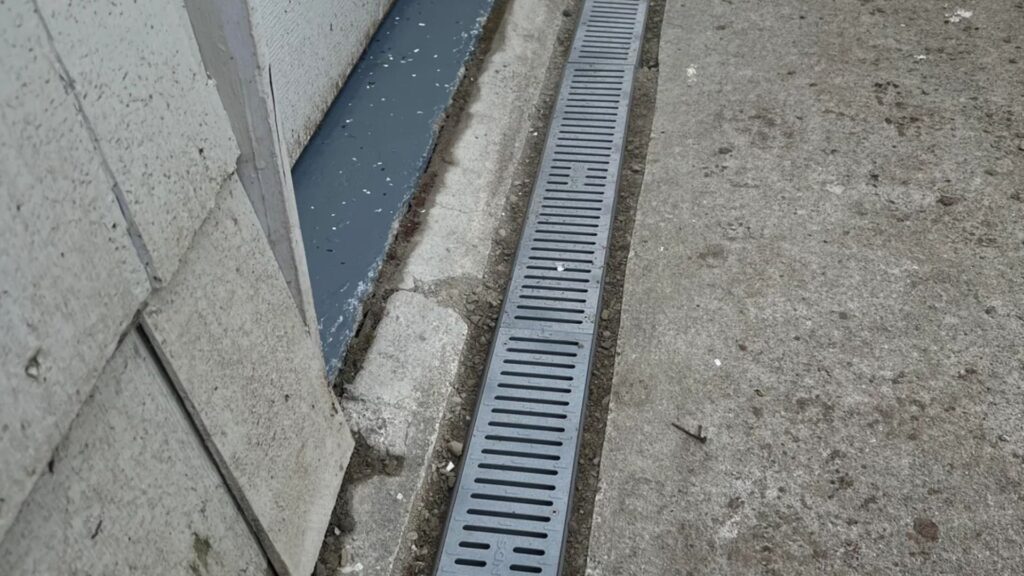
When it comes to managing surface water effectively, choosing the right type of driveway channel is essential. The diverse climate and unique landscaping needs in New Zealand make selecting the correct drainage solution even more crucial. Below, we explore the various types of driveway channels available in NZ, their pros and cons, and provide a brief cost comparison to help homeowners make an informed decision.
Grated Channels
Grated channels are one of the most common driveway drainage options in New Zealand. These channels consist of a trench drain covered by a metal or plastic grate, allowing water to pass through while filtering out debris. Grated channels are popular for both their aesthetic appeal and their durability. They can seamlessly blend into most driveway designs while remaining strong enough to withstand the weight of vehicles. One of the major pros of grated channels is their ability to handle large amounts of water, making them suitable for areas prone to heavy rain. However, their grates can occasionally clog with leaves, dirt, or other debris, requiring periodic cleaning. Another consideration is that metal grates, in particular, may become slippery when wet.
- Pros: Durable, high capacity for water flow, visually adaptable to most driveways.
- Cons: Requires regular cleaning, potential for slipperiness, higher initial cost for quality materials.
Slot Drains
Slot drains are a sleek, modern option for driveway drainage, particularly favored for minimalist designs. These drains consist of a narrow, virtually invisible slot that allows water to flow into an underground drainage system. Slot drains are excellent for homeowners looking for an unobtrusive drainage solution that won’t interrupt the visual flow of their driveway. Their streamlined design is also a safety feature, as there are no grates or exposed components that could become tripping hazards or catch debris. However, slot drains have a lower capacity than grated channels and may not be the best option for areas that experience significant rainfall or where large amounts of water runoff are expected. Additionally, their narrow design can make them more difficult to clean, as blockages might not be as easy to detect or remove.
- Pros: Minimalist design, low maintenance, safe for foot traffic.
- Cons: Lower water capacity, more challenging to clean, not ideal for heavy rainfall.
Modular Driveway Channel Systems
For those who want a customizable and easy-to-install solution, modular driveway channel systems are a smart choice. These pre-fabricated systems are designed to be highly adaptable, allowing homeowners to tailor the layout to their specific driveway and landscaping needs. Modular systems typically come in interlocking sections that can be quickly installed, reducing labor costs and project time. Many of these systems also feature snap-on grates, making them easy to clean and maintain. The major advantage of modular systems is their flexibility—they can be configured to suit driveways of various sizes and shapes, and homeowners can choose from different materials to match the style and budget of their project. On the downside, the cost of modular systems can vary widely depending on the materials used and the complexity of the installation. Additionally, while they are easier to install than traditional channels, they may not offer the same level of durability, particularly if low-quality materials are selected.
- Pros: Customizable, easy to install, adaptable to various driveways.
- Cons: Cost can vary, quality depends on materials, potential for lower durability.
Cost Comparison
In the New Zealand market, the cost of driveway channels varies significantly depending on the type of system, materials, and installation complexity. Grated channels tend to be on the higher end of the price scale, especially if you opt for corrosion-resistant metals like stainless steel. These can cost anywhere from $100 to $300 per linear meter, depending on the material and design. Slot drains, being more streamlined and less complex, typically cost less, with prices ranging from $50 to $150 per linear meter, though custom designs or premium materials can push the price higher. Modular systems vary widely in cost based on their complexity and the materials chosen. Basic plastic modular systems can start at around $50 per meter, while more durable options using metal or reinforced materials can cost upwards of $200 per meter. Installation costs will further impact the final price, with DIY projects saving on labor but potentially compromising on quality or longevity.
In conclusion, when selecting a driveway channel in New Zealand, homeowners need to consider both the functional requirements and the aesthetic impact of their choice. From the durable and highly functional grated channels to the sleek and minimalistic slot drains, and the customizable modular systems, each option presents unique advantages and challenges. Evaluating the pros and cons of each type, alongside their cost implications, will help ensure that your driveway drainage system not only fits your budget but also performs effectively in managing New Zealand’s varied weather conditions.
How To Choose The Right Driveway Channel For Your Property
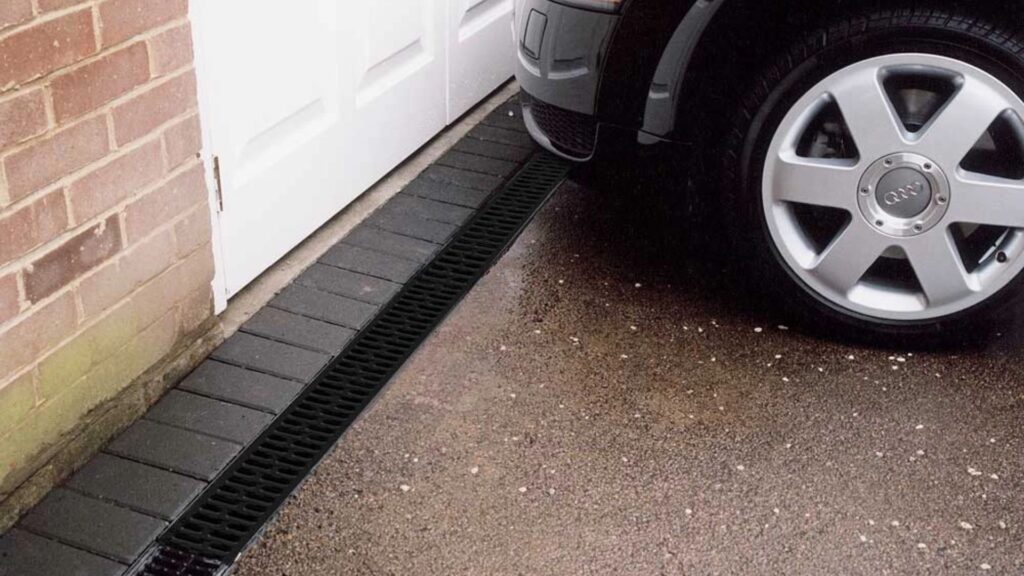
When selecting the perfect driveway channel for your property, it’s crucial to weigh several factors to ensure you’re making the best decision for both aesthetics and functionality. The right drainage channel can protect your property from water damage, improve the longevity of your driveway, and even enhance curb appeal. Here’s a breakdown of the most important considerations.
Considerations Based on Driveway Material
Your driveway’s material will significantly impact your channel choice. Whether your driveway is made of concrete, asphalt, or gravel, each material has different needs when it comes to drainage.
- Concrete Driveways: Channels for concrete driveways should prioritize durability. Concrete can crack over time due to freeze-thaw cycles, and poorly managed water flow can accelerate this process. Opt for heavy-duty channels made of materials like polymer concrete or galvanized steel, which are both corrosion-resistant and sturdy enough to handle potential expansion or contraction caused by weather changes.
- Asphalt Driveways: Asphalt, while flexible and more affordable than concrete, can suffer from potholes and soft spots if water isn’t directed away properly. Look for channels with a grating system that efficiently diverts water away from the surface. Plastic or polymer channels are often sufficient for asphalt, as long as they have strong UV resistance to prevent cracking under the sun.
- Gravel Driveways: Gravel can be trickier because water tends to pool in low spots, causing erosion. For gravel driveways, choose a wider, more open channel that prevents debris from clogging the system. Opt for channels with a solid grate cover that can block larger pieces of gravel from getting into the drainage system.
Aesthetic vs. Functionality
When selecting a driveway channel, it’s easy to get caught up in aesthetics. After all, you want something that looks good and blends in with your property’s overall design. However, functionality should never be sacrificed for looks.
- Aesthetic Considerations: For those who prioritize aesthetics, look for channel grates that come in various finishes and patterns. Stainless steel grates, for instance, offer a sleek, modern appearance that works well with contemporary homes, while cast iron grates can add a more traditional or rustic feel. Some channels even allow for custom coloring to match the surrounding materials.
- Functionality Considerations: While appearance is important, the primary purpose of a driveway channel is to manage water flow. Ensure that the channel’s design effectively prevents water from pooling, especially during heavy rain. Grates should have enough open area to allow for efficient water flow, and the channel itself should be deep enough to handle your area’s typical rainfall.
Balancing both factors is essential. You may want a channel that enhances your driveway’s visual appeal, but it’s crucial to ensure that it performs its primary job: protecting your driveway from water damage.
Load-Bearing Capacity
One of the most crucial yet often overlooked aspects of choosing a driveway channel is its load-bearing capacity. Driveways, especially those used for parking multiple vehicles, experience constant weight pressure. Choosing a channel that can handle the weight of these vehicles is vital for long-term durability.
- Light Traffic: For residential driveways with light traffic, such as those primarily used for family cars, a standard load-bearing channel will usually suffice. Channels made from plastic or lightweight polymer can handle these conditions as long as the vehicles don’t exceed their weight capacity.
- Heavy Traffic: However, if you have larger vehicles, such as trucks, RVs, or construction vehicles, you’ll need channels with a higher load-bearing capacity. Look for heavy-duty channels with reinforced concrete or steel construction. These are designed to withstand significant weight without collapsing or warping over time.
- Weight Ratings: Always check the weight rating of the channel you’re considering. Ensure that it exceeds the maximum load that your driveway will experience on a regular basis. Overloading a channel can lead to premature wear and tear, potentially causing more significant issues in the long run.
Final Thoughts
Choosing the right driveway channel involves a careful balance of practical and aesthetic considerations. By taking into account your driveway’s material, ensuring that your channel both looks good and functions effectively, and selecting the right load-bearing capacity for your needs, you’ll ensure that your driveway stays in top shape for years to come. Investing in the right channel not only protects your property but also enhances its overall appearance.

Driveway Channel Installation: A Step-By-Step Guide
Installing driveway channels is a practical way to manage surface water drainage, preventing damage to your property. Whether you’re a DIY enthusiast or considering hiring a professional, it’s essential to know the steps involved in the process and the tools required. This guide will walk you through the options, the materials you’ll need, and the installation process from start to finish.
DIY vs. Professional Installation
One of the first decisions you’ll need to make when installing driveway channels is whether to take on the project yourself or hire a professional.
- DIY Installation: If you have experience with similar tasks or enjoy hands-on projects, a DIY approach might save you some money. However, this option is best suited for smaller driveways or properties with straightforward drainage needs. You’ll need basic construction skills, including excavation, leveling, and working with concrete.
- Professional Installation: Hiring a professional ensures the job is done efficiently and correctly, particularly for complex installations where precise grading and large-scale excavation are required. It’s worth considering professional help if your driveway slopes significantly or if you’re not confident about managing water flow. Professionals will have specialized equipment and experience to handle the job quickly, reducing the risk of mistakes.
Tools and Materials Needed
Before starting the installation, make sure you have all the necessary tools and materials on hand. Here’s what you’ll need for a typical driveway channel installation:
Tools
- Tape measure
- Shovel or mini-excavator
- Level
- Trowel
- Rubber mallet
- Wheelbarrow
- Concrete mixer (if mixing your own concrete)
- Safety gear (gloves, safety glasses, work boots)
Materials
- Driveway channels (length depends on your driveway size)
- Grates (appropriate for your chosen channel)
- End caps and outlets
- Sand or gravel for base layer
- Concrete or mortar mix
- PVC pipes (if connecting to the stormwater system)
Step-by-Step Installation Process
Now that you’ve got everything ready, let’s dive into the actual installation process. Here’s a step-by-step guide to ensure your driveway channels are properly installed:
1. Measuring and Planning
Begin by measuring the area where the driveway channels will be installed. Consider the slope of the driveway and the direction of water flow. Your goal is to place the channels at the lowest point to capture the most runoff. Mark the placement of the channels with stakes and string, ensuring the channels align properly with the drainage system.
2. Excavation and Base Preparation
Excavate the area where the channels will be installed, making sure the trench is deep enough to accommodate both the channels and a solid base layer of sand or gravel. The base should be level and compact to provide a stable foundation for the channels. For larger installations, it may be beneficial to use a mini-excavator to save time and effort.
3. Laying and Securing the Channels
Place the driveway channels into the prepared trench, starting from one end and working your way down. Use a level to ensure that each channel is properly aligned and sloped to direct water toward the drainage outlet. Secure the channels by packing sand or gravel around them, then add concrete to lock them in place. Use a rubber mallet to gently tap the channels into their final position, ensuring they’re evenly spaced and securely fitted.
4. Finishing the Installation
Once the channels are laid and secured, install the grates, end caps, and any other finishing pieces. Grates should fit snugly over the channels, and end caps should be properly sealed to prevent leaks. If connecting to a stormwater system, make sure your PVC pipes are properly aligned and fitted to the channel outlets. Finally, inspect the entire installation for any gaps or misalignments, making necessary adjustments before the concrete fully sets.
Safety Tips During Installation
Safety is a priority when undertaking any DIY project, and driveway channel installation is no exception. Here are a few safety tips to keep in mind:
- Wear Protective Gear: Always wear gloves, safety glasses, and sturdy work boots while digging, handling concrete, and using tools. Concrete can cause burns, so long sleeves and gloves are especially important when mixing or pouring it.
- Check Utility Lines: Before digging, it’s crucial to check for any underground utility lines to avoid damage. Contact your local utilities or use a service that marks lines for you.
- Mind Your Back: When excavating or lifting heavy materials, such as concrete or large sections of the channel, always lift with your legs, not your back. Consider using wheelbarrows or enlist help for heavier loads.
- Secure the Area: If you’re working in an open area, ensure that children or pets are kept away from the work zone. Clearly mark off any hazardous areas to prevent accidents.
- Monitor Weather Conditions: Choose a clear day for the installation. Working in wet or rainy conditions can make the ground unstable, making it harder to excavate and secure the channels.
In conclusion, driveway channel installation is a manageable project for a determined DIYer with the right tools and planning. However, hiring a professional might be a more efficient route for those who want to ensure the job is done perfectly, especially in more complex setups. With proper preparation, adherence to safety measures, and careful attention to detail, you can install effective drainage that protects your driveway for years to come.
Maintaining Your Driveway Channels
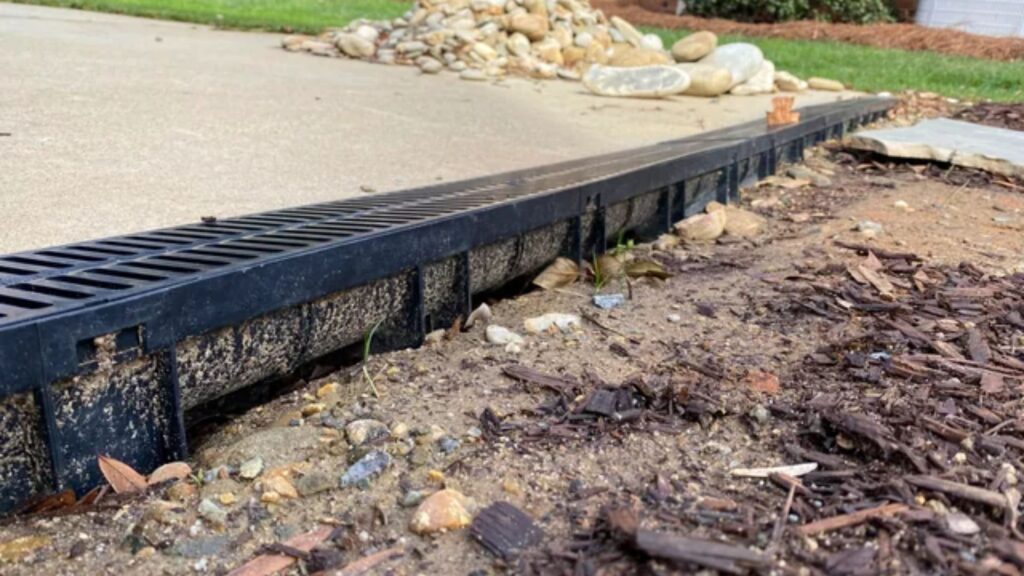
Maintaining your driveway channels is essential to keep water flowing smoothly and prevent any potential damage to your driveway. Over time, debris, seasonal weather, and wear and tear can impact the functionality of these channels, so regular attention is necessary to ensure they perform optimally.
Routine Cleaning
One of the most critical aspects of maintaining driveway channels is keeping them clear of debris, leaves, and dirt. Especially in regions like New Zealand, where the wind can blow leaves and other debris into driveway channels, neglecting regular cleaning can result in blockages. These blockages can prevent water from draining properly, leading to puddles or even structural damage to the driveway over time. A simple routine of sweeping or using a hose to flush out the channels every few weeks can help keep them clear. For more stubborn build-ups, a pressure washer can work wonders. By making this a habit, you’ll extend the life of your driveway and avoid costly repairs.
Seasonal Maintenance
In New Zealand, seasonal changes can have a significant impact on driveway channels. Autumn brings an influx of fallen leaves, which can quickly clog your channels. During this time, increasing the frequency of cleaning is essential to prevent blockages. Consider using leaf guards or mesh covers over your channels to reduce the amount of debris that enters them. Winter poses a different challenge with rain and frost. Driveway channels need to be free of blockages to allow rainwater to drain effectively and prevent water from freezing inside the channels, which could lead to cracks or breaks. Regular inspections and cleaning before and after heavy rains or frost will ensure that your channels continue to function correctly throughout the colder months. If your area is prone to snowfall, be mindful of ice build-up and consider de-icing products that won’t damage the materials of your channels.
Signs of Wear and When to Replace Channels
Over time, driveway channels can experience wear and tear from constant exposure to the elements, vehicle traffic, and even the chemicals used to treat ice or snow. Cracks, chips, and warping are all signs that your channels may be deteriorating. If you notice that water is not draining as efficiently as it once did, or you spot visible damage such as sections lifting or crumbling, it may be time to inspect them more closely. In some cases, simple repairs such as sealing cracks may suffice, but in others, especially when the damage is extensive, replacing the channels might be necessary. It’s best to consult with a professional if you’re unsure, as they can assess the condition of your channels and recommend either repairs or replacement. Regular inspections will help you catch these issues early, saving you from more significant damage and expensive repairs down the road.
By staying on top of these maintenance tasks, you can ensure that your driveway channels remain in good working condition, protect your driveway from water damage, and ultimately prolong the life of your entire driveway system.

Cost Of Driveway Channels In NZ
When considering the cost of driveway channels in New Zealand, a variety of factors come into play, ranging from the type of materials you choose to how the installation is carried out. Getting a proper breakdown of these costs can help homeowners budget effectively and make informed decisions.
Average Price Range
On average, the cost of driveway channels in New Zealand can range between $50 and $150 per meter, depending on the materials and the complexity of the installation. Basic plastic channels tend to be on the lower end of the scale, while concrete and metal channels are more expensive due to their durability and longevity. In terms of labor, professional installation fees typically range between $50 to $100 per hour, depending on the region and the experience of the contractor. For a typical driveway of about 20 meters, you could be looking at a total cost of anywhere between $1,000 and $3,000, including both materials and labor.
Factors Affecting Cost
Material Type (Concrete vs. Plastic vs. Metal)
The type of material you choose for your driveway channels will significantly affect the overall cost. Plastic channels are the most affordable, costing between $50 to $70 per meter. They are lightweight and easy to install but might not be as durable as other options. Metal channels, particularly stainless steel or galvanized options, are highly durable and offer excellent longevity, but they come with a higher price tag, typically ranging between $100 to $150 per meter. Concrete driveway channels are also a popular option due to their strength and durability, costing between $70 and $100 per meter. Concrete channels are particularly suited for larger driveways and areas with heavy rainfall as they are capable of handling significant water flow.
Length of the Driveway
Another critical factor that will influence the cost of your driveway channels is the length of the driveway. Naturally, the longer the driveway, the more materials will be required, which drives up costs. A longer driveway also means more labor hours for installation, which will increase the overall expense.
Professional vs. DIY Installation
Deciding whether to hire a professional or opt for a DIY installation can also impact your final cost. Professional installation ensures the job is done correctly and meets local building regulations, but it adds to the expense. Hiring a contractor in NZ could cost between $50 to $100 per hour for labor, depending on the complexity of the project and the contractor’s experience. On the other hand, if you have the right tools and skills, a DIY installation could save you a significant amount on labor costs. However, you must ensure that the installation is done correctly to avoid future drainage issues, which could become more expensive to fix down the line.
Budgeting Tips
1. Choose the Right Materials: If you’re on a tight budget, plastic channels may be the best option. However, if longevity and durability are your top priorities, consider investing in concrete or metal channels. It’s often worth spending a bit more upfront for higher-quality materials that will last longer and reduce the likelihood of costly repairs.
2. Consider a Partial DIY Approach: If you have some basic DIY skills, you could consider doing part of the work yourself, such as preparing the site or even installing the channels if they are plastic. For more complex materials like concrete or metal, it’s often better to hire a professional, but handling some tasks on your own can cut down labor costs.
3. Shop Around for Quotes: Always get multiple quotes from different contractors to ensure you’re getting the best deal. Prices can vary significantly between providers, so taking the time to compare options can lead to significant savings.
4. Plan for the Future: When budgeting, don’t just think about the upfront costs. Consider the long-term maintenance and durability of the materials you choose. Spending a little more now on durable materials may save you from having to redo the job in a few years, which will be much more expensive in the long run.
By considering these factors and budgeting tips, you can keep costs manageable while still ensuring your driveway channels are functional, durable, and installed to a high standard.

Eco-Friendly Options For Driveway Channels
When it comes to designing driveways in New Zealand, eco-friendly options are gaining popularity as people increasingly look for ways to minimize their environmental impact. One significant aspect of creating a sustainable driveway is choosing eco-friendly materials and solutions for drainage channels. Let’s explore some of these options.
Sustainable Materials
Using sustainable materials in driveway channels is one of the easiest ways to make your project more eco-friendly. Instead of opting for traditional concrete or metal, consider using recycled materials such as recycled plastic. These materials are durable, often just as strong as their non-recycled counterparts, and they help reduce the environmental footprint by diverting waste from landfills. Permeable systems are another great option for driveway channels. Permeable pavers or grids allow water to seep through them into the ground, which helps with water management and reduces surface runoff. This approach promotes natural water absorption and replenishes groundwater, making it an excellent option for eco-conscious homeowners in New Zealand.
Water Harvesting
Incorporating water harvesting systems into driveway channels is an innovative and practical approach to sustainability. In New Zealand, rainwater collection is becoming increasingly popular due to fluctuating water supplies and growing concerns about water conservation. By integrating driveway channels with a rainwater collection system, homeowners can efficiently capture runoff from their driveway and use it for non-potable water needs, such as garden irrigation or car washing. This not only reduces reliance on municipal water systems but also helps manage stormwater more effectively, reducing the risk of flooding or erosion in areas with heavy rainfall.
Low-Impact Drainage Solutions
Low-impact drainage solutions are designed to minimize environmental disruption while effectively managing stormwater. One method is using porous materials, such as gravel or permeable concrete, in your driveway channels. These materials allow water to percolate into the soil rather than running off into storm drains, which reduces the burden on local water systems and prevents pollution from entering nearby waterways. Another effective solution is integrating natural filtration systems into your driveway channel design. For instance, vegetated swales or bioswales can be incorporated alongside driveways to filter and cleanse stormwater naturally before it reenters the water table. These systems not only enhance the aesthetic appeal of a property but also support local ecosystems by providing a habitat for plants and insects.
In summary, embracing eco-friendly options for driveway channels in New Zealand can contribute to a more sustainable environment. By choosing sustainable materials, incorporating water harvesting systems, and utilizing low-impact drainage solutions, you can significantly reduce your environmental footprint while still enjoying a functional and visually appealing driveway. These methods not only benefit your property but also contribute to the well-being of the planet.
Driveway Channels And Local Regulations In NZ
Building Code Requirements
When installing driveway channels in New Zealand, it’s important to be aware of the specific regulations outlined in the New Zealand Building Code. These regulations are designed to ensure that driveway installations, particularly those that impact stormwater management, are safe and effective. Proper stormwater management is crucial as it prevents flooding and protects the surrounding environment. In general, driveways must be constructed in a way that allows water to flow to designated drainage systems rather than pooling on the surface or causing runoff issues.
NZ’s Building Code, particularly Clause E1 (Surface Water), outlines requirements for the disposal of stormwater. Driveways, being impervious surfaces, can generate significant runoff, and the installation of driveway channels helps manage this. The driveway channels should be positioned to collect and redirect water away from the driveway and other structures, directing it towards approved stormwater outlets. It’s essential to use materials and installation methods that comply with local standards, ensuring durability and effectiveness over time. Adhering to these regulations is not only a legal requirement but also contributes to the long-term health of your property by preventing water damage.
Council Permits and Compliance
Before you start digging and installing driveway channels, it’s crucial to check with your local council about any necessary permits. Different councils across New Zealand have varying rules regarding the installation of driveway channels, depending on the location, size of the driveway, and proximity to stormwater drains. Typically, homeowners will need to apply for a permit if the installation of a driveway channel is likely to affect the public drainage system or requires excavation work that extends beyond the property boundary.
Councils may also impose restrictions on the type of materials used, as well as the size and location of the channels. For example, some councils may have specific requirements around the width of the driveway, ensuring it does not interfere with public footpaths or roadways. Additionally, the design of the channel must take into account factors such as erosion control and flood prevention. This is especially important in areas prone to heavy rainfall, where inadequate drainage can lead to significant issues.
To avoid potential fines or having to redo the work, it’s advisable to submit a detailed plan of the proposed driveway channel installation to your local council. This plan should include information on materials, layout, and how the channel will integrate with the existing stormwater management system. The council will assess the proposal to ensure it complies with local regulations, and once approved, you can proceed with the project. Keep in mind that failure to comply with council regulations could result in penalties or the requirement to remove or alter the installation.
By taking the time to understand the local regulations and ensuring that your installation meets both the building code and council requirements, you can avoid unnecessary complications and ensure your driveway channels are both effective and legally compliant.

fAQS: About driveway channels nz
What are driveway channels?
Driveway channels, also known as trench drains, are drainage systems installed along driveways to capture and direct surface water away from the driveway, preventing flooding, erosion, and damage to the driveway and surrounding property.
Why are driveway channels important in New Zealand?
Due to New Zealand’s frequent heavy rainfall, driveway channels help manage stormwater effectively, reducing the risk of water pooling, which can lead to erosion and long-term damage to driveways, foundations, and landscapes.
What materials are used for driveway channels in NZ?
Common materials for driveway channels in NZ include concrete, plastic, and metal. Concrete is durable and strong, plastic is lightweight and cost-effective, and metal, such as stainless steel, is often used for high-traffic areas due to its strength and durability.
How do I know if my driveway needs a channel?
If you notice frequent water pooling, erosion, or water runoff that flows toward your home or garage during rainstorms, installing a driveway channel can help prevent these issues and protect your driveway and property.
Can I install driveway channels myself, or should I hire a professional?
While DIY installation is possible for those with experience and the proper tools, hiring a professional is recommended for larger or more complex driveways to ensure the channels are installed correctly and efficiently.
How much does it cost to install driveway channels in New Zealand?
The cost can vary depending on the material, length of the driveway, and whether you hire a professional. On average, prices can range from $50 to $200 per meter for materials and installation.
What maintenance is required for driveway channels?
Regular maintenance includes cleaning out debris, such as leaves and dirt, that can clog the channel. Seasonal inspections are recommended, particularly after storms, to ensure the channels remain clear and functional.
Are there eco-friendly options for driveway channels?
Yes, there are eco-friendly options such as recycled plastic channels or permeable systems that allow water to naturally filter into the ground, reducing the environmental impact while still providing effective drainage.
Do I need a permit to install driveway channels in New Zealand?
Depending on your location and the scale of the installation, you may need a permit. It’s best to check with your local council to ensure compliance with building codes and stormwater regulations.
Can driveway channels be installed on any type of driveway?
Yes, driveway channels can be installed on most driveway types, including concrete, asphalt, gravel, and pavers. The key is selecting the right type of channel for the specific material and ensuring proper installation to handle water flow effectively.
conclusion
In conclusion, ensuring proper drainage with driveway channels is essential for maintaining the integrity of your driveway, safeguarding against water damage, and boosting the overall value of your property. If you’re noticing issues with water pooling or drainage around your driveway, now is the time to take action. Evaluating your driveway’s current condition and considering the installation of channels can prevent costly repairs in the future. Don’t hesitate to reach out to local suppliers or contractors in New Zealand to get expert advice or assistance with selecting and installing the right driveway channel solution for your needs.
About the Author:
Mike Veail is a recognized digital marketing expert with over 6 years of experience in helping tradespeople and small businesses thrive online. A former quantity surveyor, Mike combines deep industry knowledge with hands-on expertise in SEO and Google Ads. His marketing strategies are tailored to the specific needs of the trades sector, helping businesses increase visibility and generate more leads through proven, ethical methods.
Mike has successfully partnered with numerous companies, establishing a track record of delivering measurable results. His work has been featured across various platforms that showcase his expertise in lead generation and online marketing for the trades sector.
Learn more about Mike's experience and services at https://theleadguy.online or follow him on social media:

